PÓNGASE EN CONTACTO CON NOSOTROS AHORA PARA RECIBIR UN PRESUPUESTO RÁPIDO, SOPORTE DE MUESTRAS Y GARANTÍA DE SERVICIO DE INGENIERÍA.


Clip In Ceiling Installation Guide: Step by Step
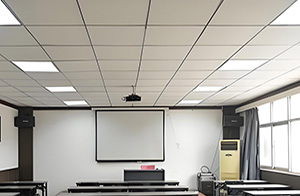
Clip in ceiling systems are one of the most popular ceiling solutions for modern commercial interiors due to their clean appearance, concealed suspension structure, and easy maintenance access. These aluminum ceiling systems are widely used in offices, hotels, hospitals, shopping malls, airports, and other high-traffic commercial buildings where durability, aesthetics, and functionality are essential.
Compared with traditional exposed grid ceilings, aluminum clip in ceiling panels create a seamless and professional finish while offering excellent moisture resistance, corrosion resistance, fire performance, and long service life. Their concealed carrier system also helps improve the overall visual effect of modern architectural spaces.
Proper installation is critical for achieving a flat ceiling surface, secure panel alignment, and long-term structural stability. Incorrect spacing, poor leveling, or improper coordination with lighting and HVAC systems may affect both appearance and maintenance efficiency. Following a professional step by step clip in ceiling installation guide can help reduce installation errors and improve project quality.
This commercial ceiling installation guide explains the complete installation process for aluminum clip in ceiling panels, including site preparation, suspension system installation, panel clipping methods, lighting integration, and final inspection procedures. Whether for office ceiling projects, hotel renovations, or public building applications, proper installation ensures a durable and visually attractive ceiling system.
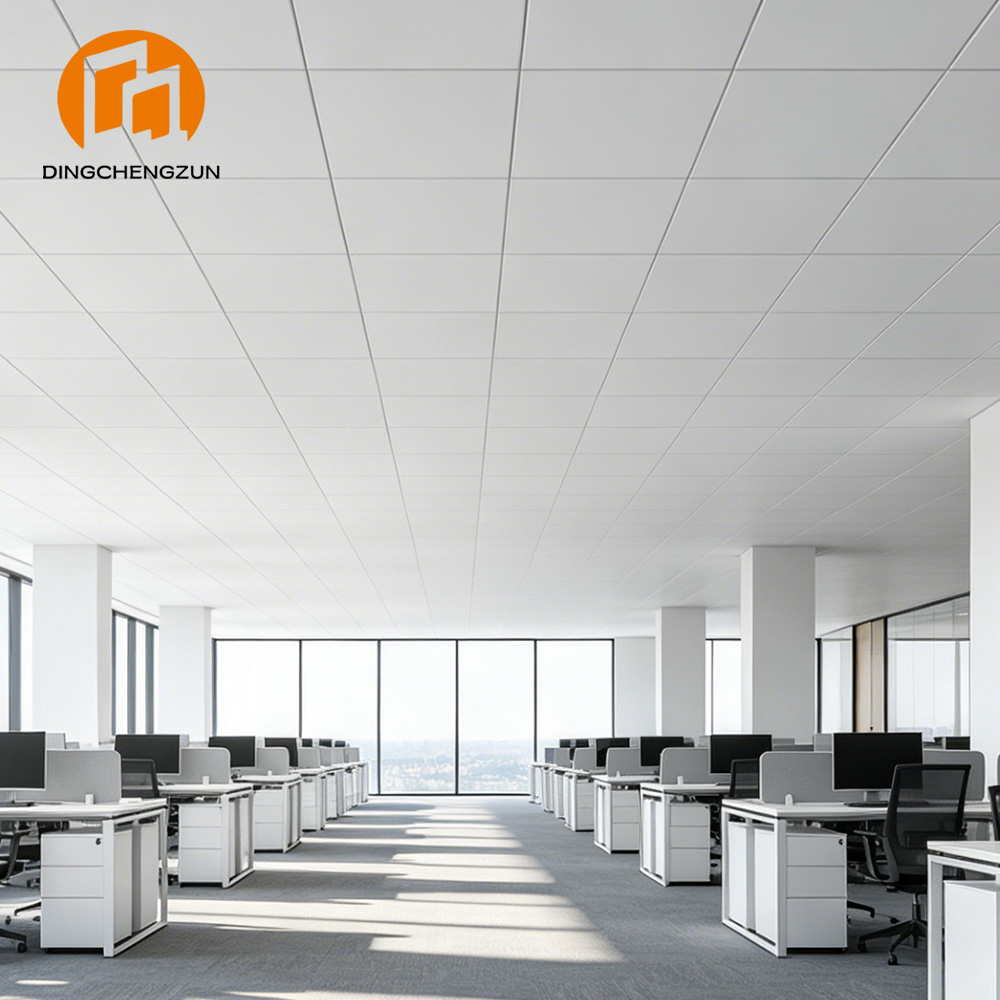
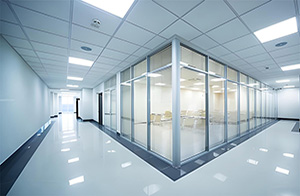
Bandejas de techo de aluminio para edificios de oficinas comerciales
Designed for commercial office interiors, these aluminum ceiling tiles create a clean, flat, and professional suspended ceiling surface that supports modern workplace aesthetics. Suitable for open offices, meeting rooms, lobbies, corridors, and other professional spaces. :contentReference[oaicite:1]{index=1}
- Material: Aleación de aluminio de alta calidad
- Tipo de techo: Tile panels for suspended grid systems
- Acabado superficial: Powder coating / PVDF / other finishes
- Características: Durable, corrosion‑resistant, easy to clean
- Aplicaciones: Offices, reception areas, corridors, meeting rooms

Tools and Materials
Before starting the aluminum clip in ceiling installation process, it is important to prepare all required tools and materials in advance. Proper preparation helps improve installation efficiency, reduce construction errors, and ensure accurate ceiling alignment for commercial ceiling projects such as offices, hotels, hospitals, and shopping malls.
Using professional installation tools and high-quality ceiling accessories is essential for achieving a flat, secure, and durable clip in ceiling system. For large-scale commercial ceiling installation projects, organizing materials according to the ceiling layout plan can also help speed up installation and improve workflow efficiency.
Essential Materials
-
Aluminum clip in ceiling panels
-
Concealed suspension system
-
Main channels and clip-in carriers
-
Hangers, brackets, expansion bolts, and screws
-
Wall angles or edge trims
-
Acoustic backing materials (optional for sound absorption)
Required Installation Tools
-
Measuring tape
-
Laser level or spirit level
-
Electric drill and screwdriver
-
Metal shears or panel cutting tools
-
Marker and chalk line
-
Ladder or scaffolding equipment
Safety Equipment
-
Safety gloves
-
Safety glasses
-
Dust mask
-
Protective footwear
Before installation, carefully inspect all aluminum ceiling panels, carriers, and accessories to ensure there is no surface damage, bending, or missing hardware. It is also recommended to separate installation materials by working area to reduce handling time and improve installation accuracy during the step by step clip in ceiling installation process.
Once all tools and materials are prepared, the next step is site measurement and ceiling layout preparation to ensure proper suspension system installation and panel alignment.

Step-by-Step Installation
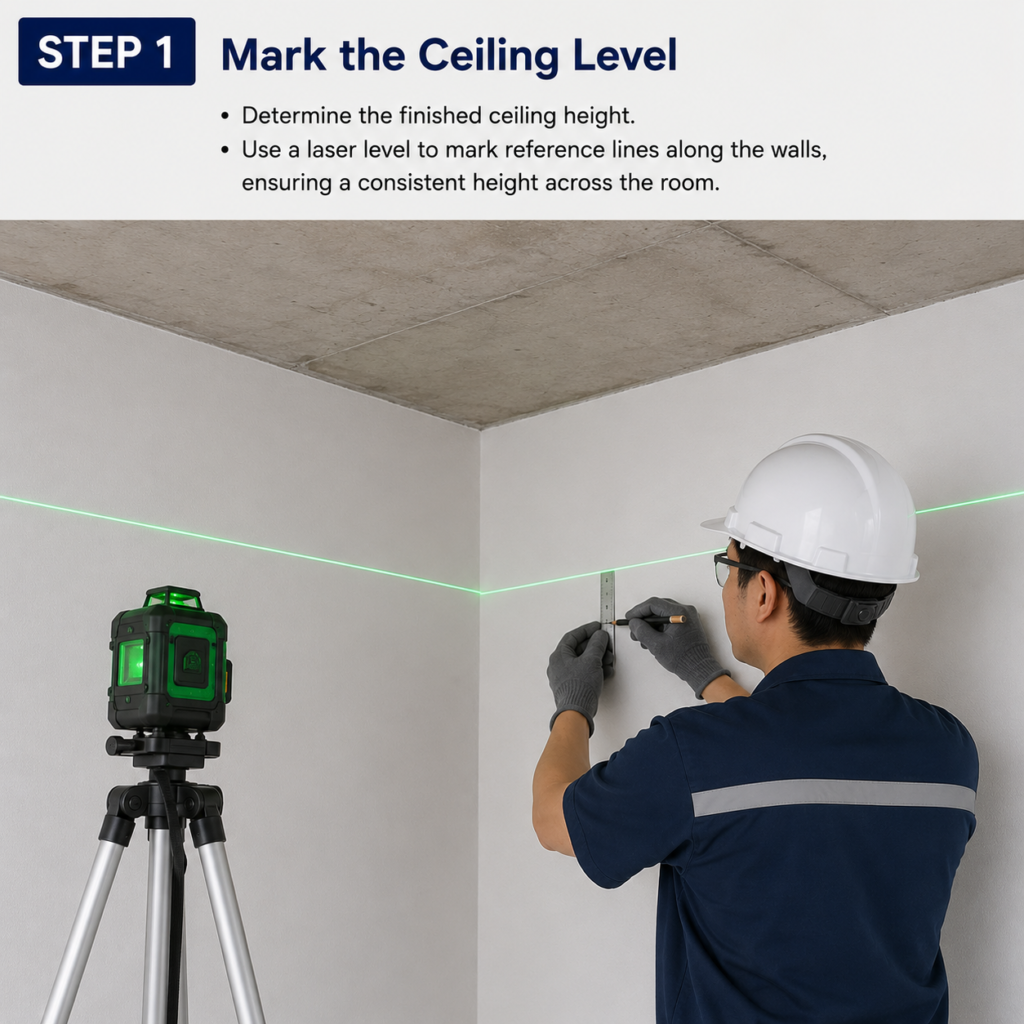
Step 1: Mark the Ceiling Level
Determine the finished ceiling height according to the project drawings and room requirements. Use a laser level to mark clear reference lines along the perimeter walls to ensure a consistent ceiling height throughout the space.
Accurate level marking is essential for office ceilings, hotel ceilings, and other commercial aluminum ceiling projects because uneven reference lines may affect panel alignment and overall ceiling appearance.
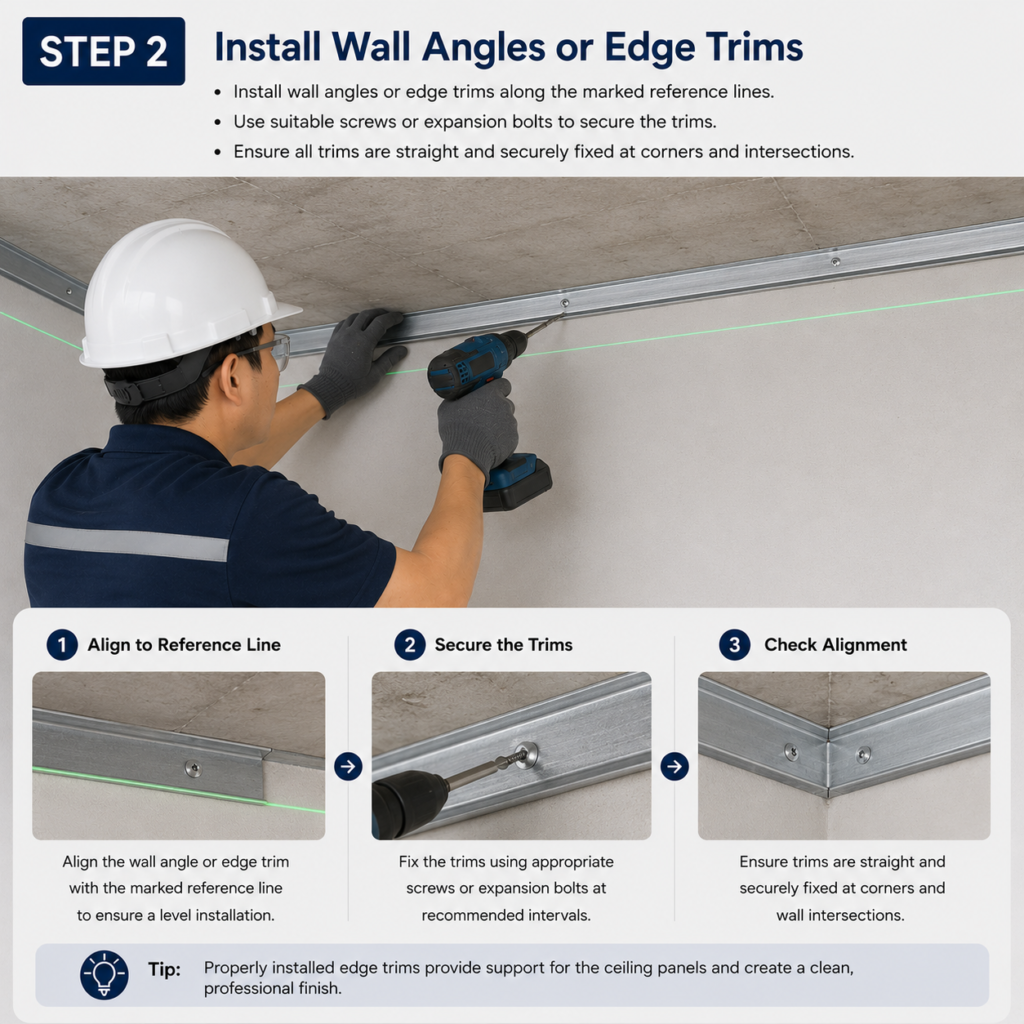
Step 2: Install Wall Angles or Edge Trims
Install wall angles or edge trims along the marked reference lines using suitable screws or expansion bolts. Ensure all trims are straight and securely fixed at corners and wall intersections.
Properly installed edge trims help support the clip in ceiling panels while creating a clean and professional ceiling finish around walls and columns.
Step 3: Install Hangers
Mark hanger positions based on the ceiling layout and carrier spacing requirements. Secure the hangers firmly to the structural ceiling and adjust the hanger lengths to achieve the correct ceiling height.
For large commercial ceiling installations, maintaining consistent hanger spacing helps improve suspension stability and prevents ceiling movement over time.Step
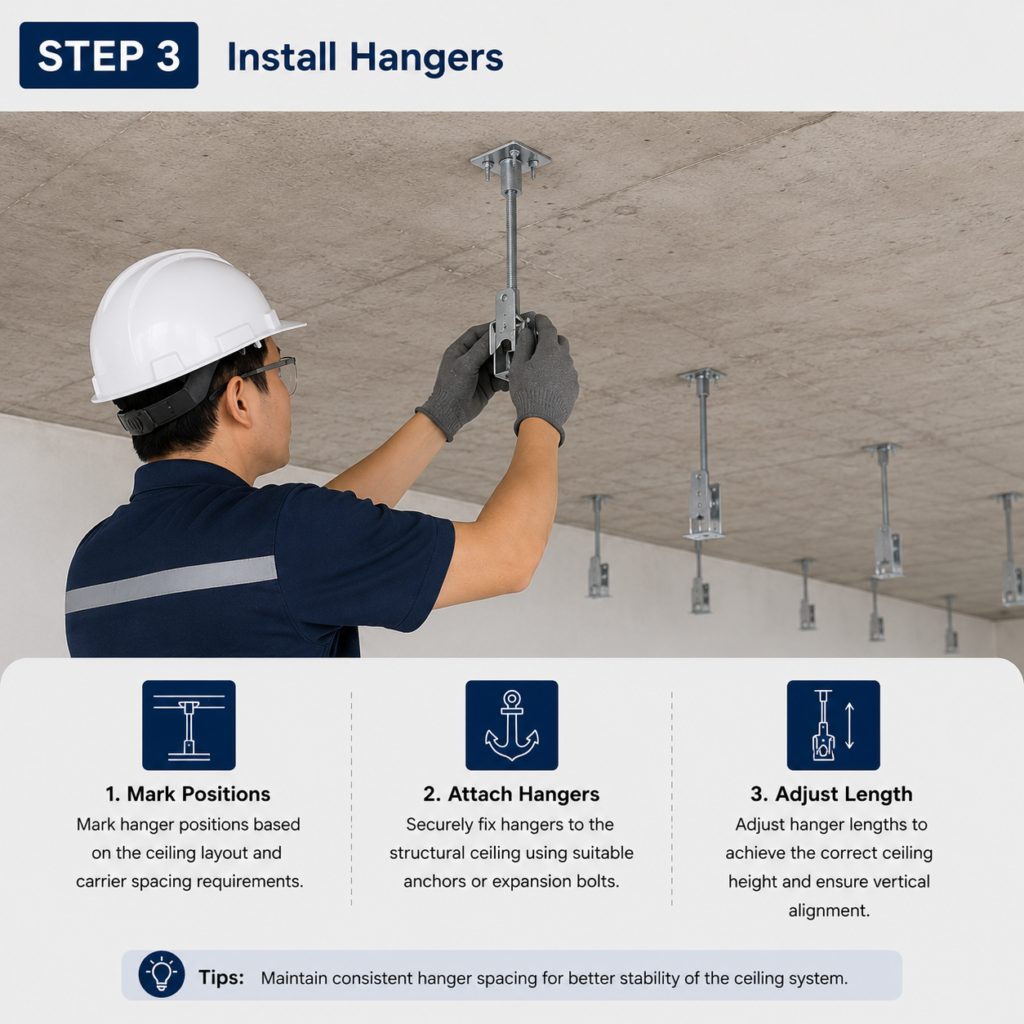
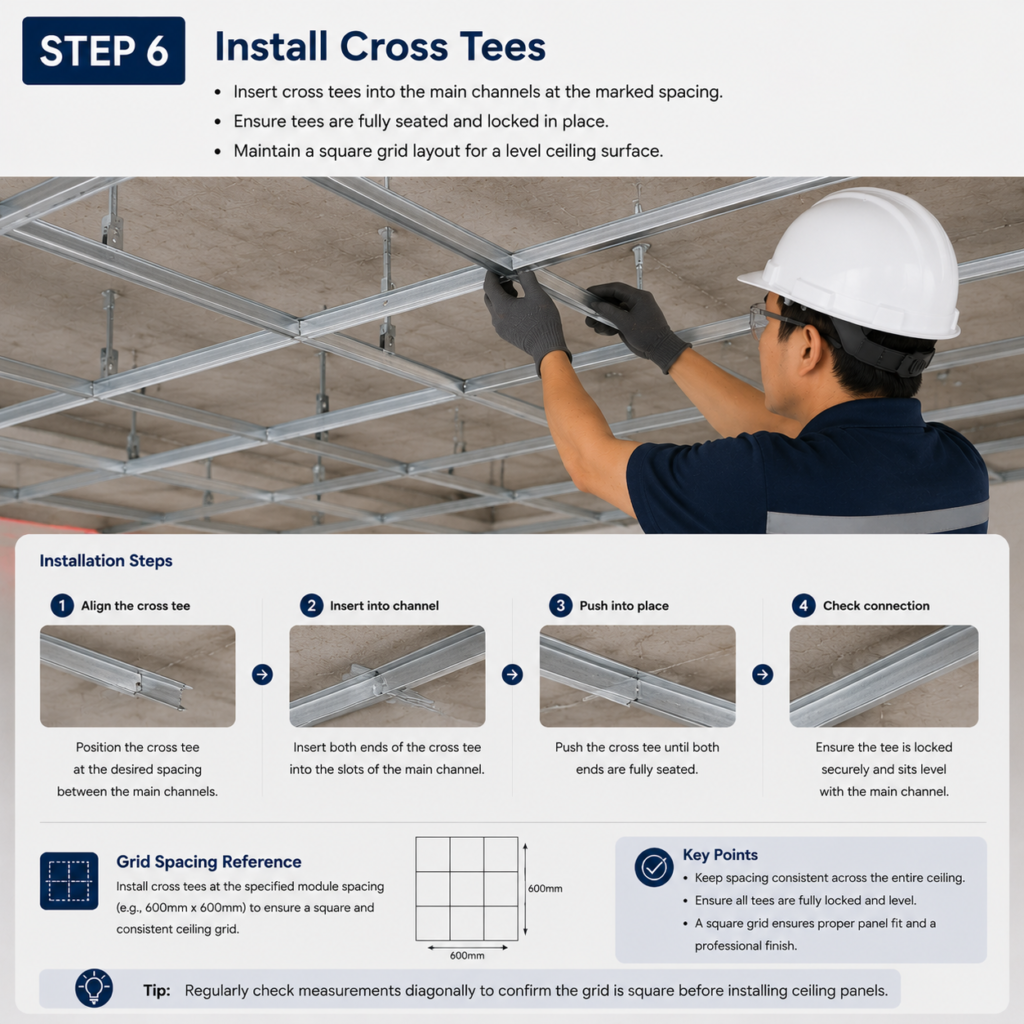
4: Install Main Channels
Connect the main channels to the hangers while maintaining accurate spacing across the ceiling area. Use a level to check horizontal alignment before tightening all connections securely.
Incorrect channel leveling may cause uneven ceiling surfaces and visible panel gaps during aluminum ceiling panel installation.

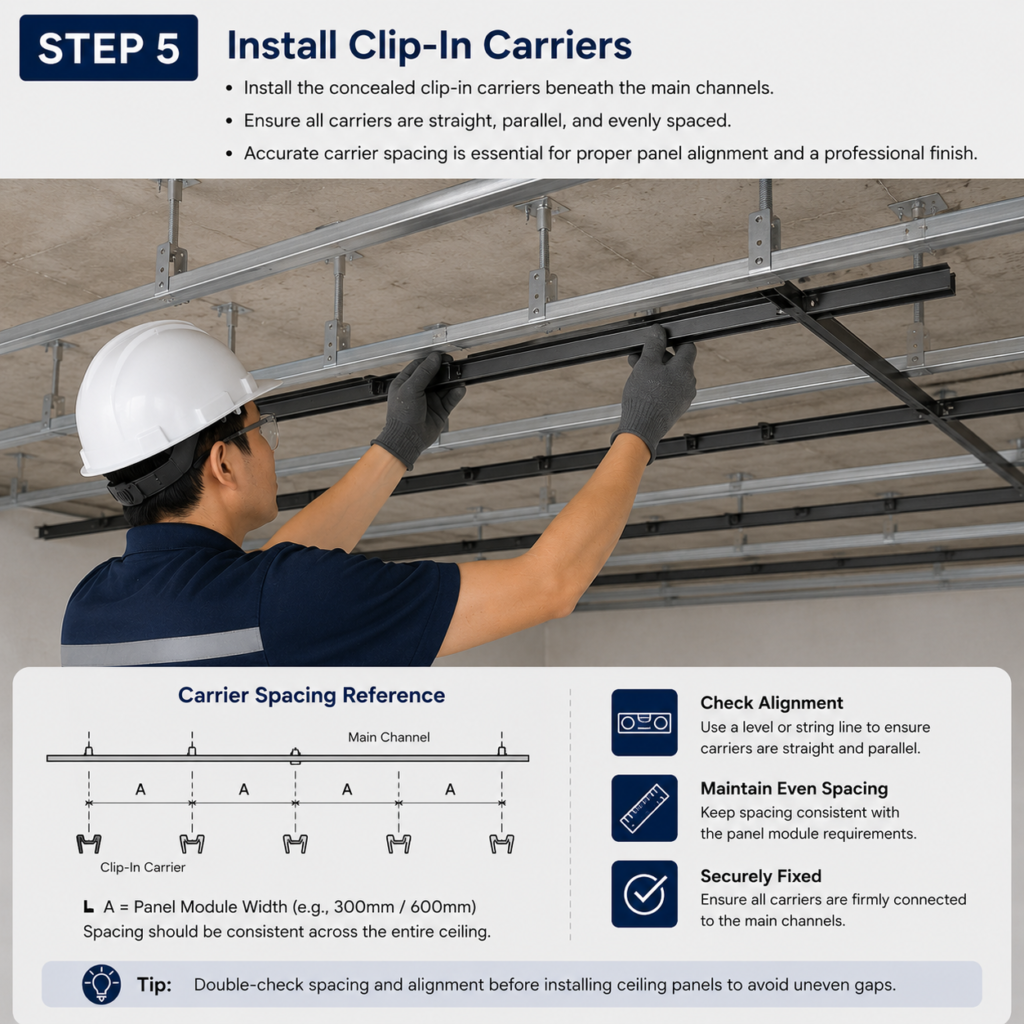
Step 5: Install Clip-In Carriers
Install the concealed clip-in carriers beneath the main channels according to the panel module dimensions. Ensure all carriers remain straight, parallel, and evenly spaced before installing ceiling panels.
Accurate carrier spacing is especially important for large office ceiling and airport ceiling projects where panel alignment directly affects the final visual appearance.
Step 6: Install Ceiling Panels
Start installing the aluminum clip in ceiling panels from one side of the room and continue systematically across the ceiling. Carefully clip each panel into the concealed carrier system until it locks securely into place.
Avoid forcing panels during installation, as excessive pressure may damage panel edges or surface coatings. Proper panel installation creates a seamless and modern commercial ceiling finish.
Step 7: Cut and Install Edge Panels
Measure perimeter areas carefully and cut edge panels according to wall dimensions, columns, or equipment openings. Use professional cutting tools to ensure smooth and accurate panel edges.
Neatly installed edge panels improve the overall appearance of the clip in ceiling system and help create a clean architectural finish.
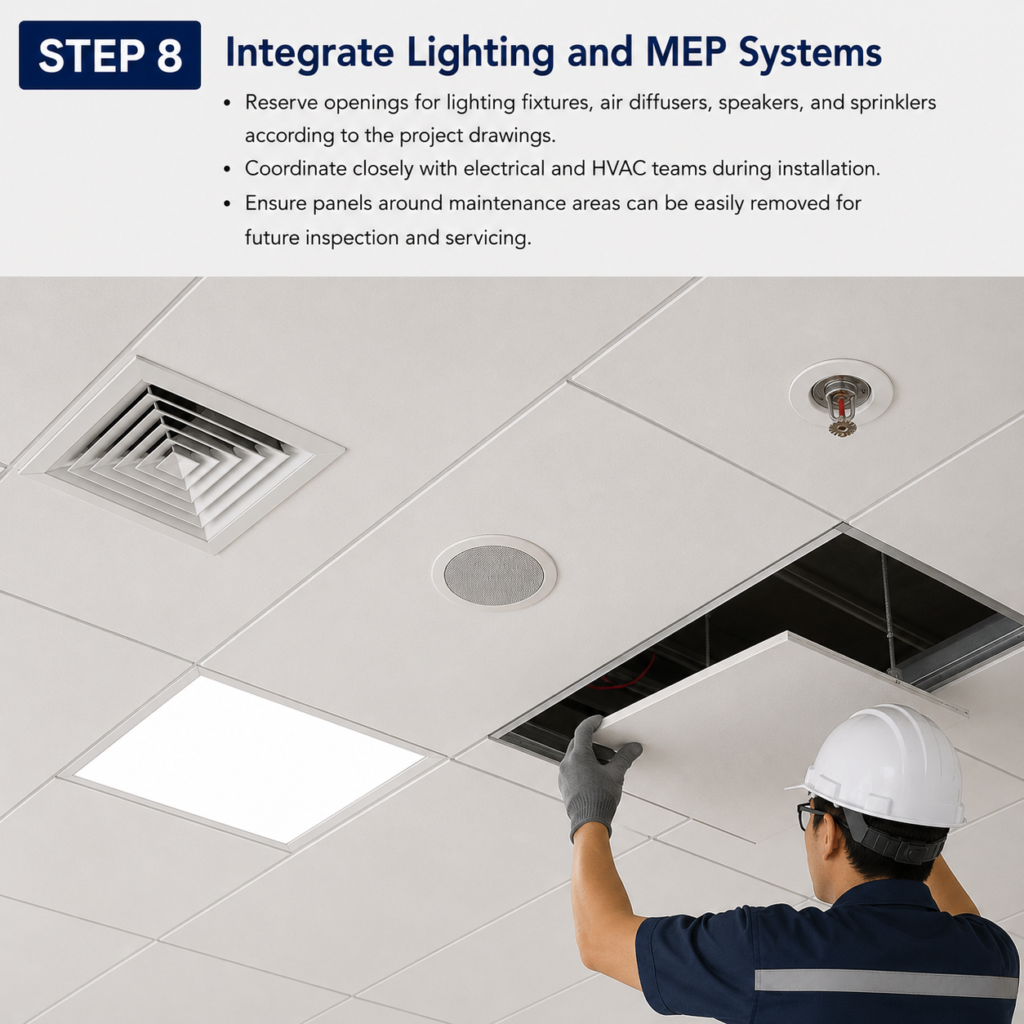
Step 8: Integrate Lighting and MEP Systems
Reserve openings for lighting fixtures, air diffusers, speakers, smoke detectors, and sprinkler systems according to the project drawings. Coordinate closely with electrical and HVAC teams during installation.
For commercial ceiling projects, it is recommended to keep maintenance access areas removable to simplify future inspection and servicing of lighting and MEP systems.
Final Inspection and Maintenance
After completing the aluminum clip in ceiling installation, a final inspection should be carried out to ensure the ceiling system is level, secure, and visually consistent. Proper inspection and routine maintenance help extend the service life of commercial ceiling systems while maintaining a clean and professional appearance.
Final Inspection
Carefully inspect the ceiling flatness and confirm that all aluminum ceiling panels are properly aligned with even panel gaps. Check that each panel is securely clipped into the concealed carrier system and that there are no loose components, visible damage, or installation defects.
Pay special attention to lighting fixtures, air diffusers, sprinkler openings, and other MEP integration areas to ensure proper installation and easy maintenance access. Uneven panel gaps and loose clips are among the most common issues found during final ceiling inspections and should be corrected before project completion.
Cleaning and Maintenance
Remove construction dust and debris using a soft cloth or non-abrasive cleaning materials. Avoid strong chemical cleaners that may damage the ceiling panel coating or surface finish.
For long-term maintenance, regularly inspect ceiling panels, carriers, hangers, and suspension components to ensure continued structural stability. Damaged panels or loose accessories should be replaced promptly to reduce future maintenance costs and maintain overall ceiling safety.
Routine maintenance is especially important for office ceilings, hotel ceilings, airport ceilings, and other high-traffic commercial ceiling projects where durability, accessibility, and long-term appearance are critical.
Common Installation Mistakes to Avoid
Proper installation is essential for achieving a flat, durable, and professional aluminum clip in ceiling system. During commercial ceiling installation projects, several common mistakes may affect ceiling appearance, panel alignment, and long-term maintenance efficiency.
Incorrect Ceiling Level
Inaccurate ceiling level marking may cause uneven ceiling surfaces and visible height differences after panel installation. Always use a laser level to verify reference lines before installing the suspension system.
Uneven or Misaligned Carriers
Incorrect carrier spacing can create uneven panel gaps and installation difficulties. Before installing aluminum ceiling panels, ensure all clip-in carriers are straight, parallel, and evenly spaced according to the ceiling layout.
Poor Coordination with Lighting and MEP Systems
Improper coordination with lighting, HVAC, sprinkler, and electrical systems may lead to installation conflicts and unnecessary panel cutting. Confirm all equipment locations before panel installation to reduce delays and improve installation efficiency.
Damaged Ceiling Panels
Improper handling or cutting methods may damage panel edges or surface coatings. Store aluminum ceiling panels in a clean and dry area and use professional cutting tools during installation.
No Maintenance Access Areas
Failing to reserve removable access panels can make future maintenance more difficult. Maintenance access is especially important for office ceilings, airport ceilings, and other large commercial ceiling projects where regular inspection of lighting and HVAC systems is required.
PREGUNTAS FRECUENTES
Q1: How long does aluminum clip in ceiling installation take?
The installation time depends on the ceiling size, layout complexity, and MEP coordination requirements. For standard office ceiling or commercial ceiling projects, clip in ceiling installation typically takes 1–3 days.
Q2: Can clip in ceiling panels be removed for maintenance?
Yes. Aluminum clip in ceiling panels are designed for easy removal and reinstallation, allowing convenient access to lighting systems, HVAC equipment, and other ceiling maintenance areas without damaging the suspension system.
Q3: Are aluminum clip in ceilings suitable for humid environments?
Yes. Aluminum ceiling panels provide excellent moisture resistance and corrosion resistance, making them suitable for hospitals, kitchens, bathrooms, airports, and other humid commercial environments.
Q4: Can lighting, sprinklers, and HVAC systems be integrated into clip in ceilings?
Yes. Commercial clip in ceiling systems are compatible with lighting fixtures, air diffusers, speakers, sprinklers, and other MEP systems while maintaining a clean and seamless ceiling appearance.
Q5: How long do commercial aluminum clip in ceiling systems last?
With proper installation and regular maintenance, aluminum clip in ceiling systems can typically last 15–20 years or longer. Regular inspection of carriers, hangers, and removable access panels helps maintain long-term ceiling performance and reduce future maintenance costs.